The Myth of the One-Size-Fits-All Hem Allowance
A one-size-fits-all hem allowance can distort a garment. Match hem depth to shape, fabric weight, and finish for a cleaner fall and easier sewing.
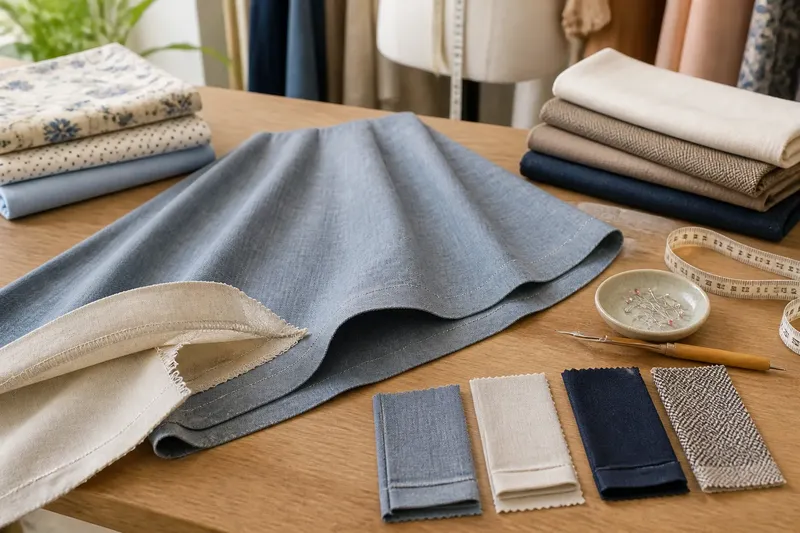
The most common hem mistake is adding the same depth to every garment, then trimming or wrestling the excess when the edge refuses to lie flat. A one-size-fits-all hem allowance can distort a curved skirt, make a lightweight sleeve feel clumsy, or leave too little cloth for a substantial trouser finish. Hem depth works best as a decision made for the edge in front of you.
Why does hem depth change with the garment shape?
A hem allowance is the fabric below the finished edge, folded or otherwise secured to the inside. Its depth affects how that edge turns, hangs, and reads from the outside. A straight edge offers room for a deeper fold; a curved edge asks the fabric to cover a changing distance as it turns inward.
On a flared skirt or rounded shirt tail, a wide turned hem has more fabric at its inner fold than the garment edge can easily accommodate. The result may ripple, bunch, or need small easing stitches. A narrower hem reduces that excess. A facing—a shaped piece of fabric attached along the edge and turned inside—can be a better choice when the curve is pronounced or the intended hem is visibly deep.
Straight hems, such as many trouser legs or boxy shirt bottoms, are more forgiving. They can take a wider fold if the fabric’s weight and the garment’s design support it. But a generous allowance is not automatically more durable or polished: it adds bulk and may show as a ridge through fine fabric.
How does fabric weight affect the fold?
Heavy cloth stacks up quickly. Denim, wool coating, and canvas can become stiff where several layers meet, especially at side seams. A narrower turn-up or a separate facing can keep the edge from feeling like a ledge. If a deep hem is part of the design, reduce bulk at seam allowances where suitable, following the garment’s construction rather than cutting blindly through finished seams.
Light fabric has the opposite problem: a deep turn can hang heavily and pull the edge out of shape. Chiffon, voile, and fine cotton lawn often suit a slim finish, such as a narrow double-fold hem or a rolled finish made for the fabric. The fold should be stable enough to sew without puckers, but not so thick that it becomes a visible band.
Medium-weight fabric leaves more room to choose. A cotton shirt may take a modest double fold, while a structured skirt in similar-weight cloth could be designed with a deeper hem for visual balance. Fabric content, weave, lining, and seam bulk all influence the result; the word “cotton” alone does not settle the question.
Which finish suits which edge?
The hem finish determines how much cloth is needed and how much bulk the inside will carry. Consider the intended look as well as the sewing method:
- Double-fold hem: The raw edge is enclosed by folding it under, then folding again. It suits many straight edges, but two folds can be bulky in thick fabric or awkward around a tight curve.
- Narrow hem: A slim double fold keeps the finish discreet on light fabric and curved edges. It takes care and even feeding to avoid a wavy result.
- Faced hem: A shaped facing supports a deeper finished edge without asking the garment fabric to turn inward by the same depth. It can work well on curves, lined garments, or designs where the inside finish should stay controlled.
- Blind-stitched hem: Hand or machine stitches catch the inside with minimal visibility outside. The allowance still needs to suit the fabric and shape; hidden stitches cannot correct a bulky or poorly turned fold.
- Overlocked or bound edge: These finishes can secure the raw edge before it is turned, or finish an edge with little turn-up. Choose them for the design and fabric, not as a substitute for deciding the desired finished length.
Follow the pattern’s allowance when it specifies a finish, and check the fabric or machine maker’s guidance where relevant. If adapting a pattern, preserve enough cloth for the finish you intend to sew.
How can you choose a workable allowance before cutting?
Start with the finished length and the edge shape, not a remembered number. Mark the intended hemline on the garment or pattern, then consider how the allowance will turn to meet it. For a curved edge, compare the outer cut line with the inner fold: if the inner edge needs to shrink into a shorter path, a wide turn may need easing, clipping where appropriate, or a different finish.
Make a sample with the actual fabric when the finish is unfamiliar. Fold and sew a small scrap, including a seam if it will cross the hem. This reveals whether the layers press flat, whether the machine feeds them evenly, and whether the finished edge looks too heavy. A scrap also helps distinguish a sewing problem from an allowance that simply does not suit the fabric.
Say you are shortening a flared cotton skirt with a curved bottom. If a broad double fold creates little waves on the sample, you could try a narrower turn or a shaped facing; the expected visible change is a flatter edge with less fabric gathered at the inner fold. The right choice depends on the skirt’s design and how much length you want to retain.
What do sewists ask about hem allowances?
How deep should a trouser hem be?
Choose a depth that suits the trouser’s cut, fabric, and intended finish, while leaving enough allowance below the finished length. A straight leg in sturdy cloth can often support a deeper turn than a fine, tapered leg, where bulk may affect the shape.
Can a curved hem have a wide allowance?
It can, but the inner fold may have more fabric than the curved edge can absorb smoothly. A narrower hem, carefully eased fold, or shaped facing may control the edge better, depending on the fabric and design.
Does a blind hem need extra allowance?
It needs enough fabric to turn up to the finished length and provide a stable area for the stitches. The stitch type does not set a universal depth; check the machine’s instructions if using a blind-hem foot or stitch.
Should a lining end at the same level as the outer hem?
Not always. A lining may be finished separately so it hangs freely inside without pulling on the outer layer, but its placement depends on the garment’s construction. Keep the lining clear of the outer hem’s fold and follow the pattern or maker’s instructions where available.
What should the finished edge tell you?
Look at the garment from both sides after pressing. The outer edge should follow the intended shape without ripples, while the inside should lie smoothly without a hard ridge or strained stitches. A hem that looks tidy on the table can still tug when worn, so check how it falls on the body or over the shoes it is meant to accompany.
The useful rule is not a fixed depth but a sequence of questions: what shape is this edge, how much bulk will this fabric tolerate, and what finish will create the intended look? Keep those choices together, and the hem allowance becomes part of the garment’s fit and balance—not a number copied from the last project.